
Nothing drives users away faster than a slow website. With mobile users completely taking over online traffic, making sure your website loads quickly is more important than ever. In this post, we’ll cover the 5 easiest ways to speed up your website and hopefully solve your loading problems for good.
1. Reduce Your Website’s Number of HTTP Requests
HTTP requests are packets of data that your computer sends to a website whenever it tries to load a web page. This includes text, images, stylesheets, scripts, and other forms of data. The fewer requests a website needs to process, the faster it can send the information it’s being asked to deliver.
This makes it a good idea to have your website deliver as few requests as possible. So if your website is suffering from slow load speeds, the first thing you should look at doing is decreasing the number of requests it has to serve up each time it loads a page.
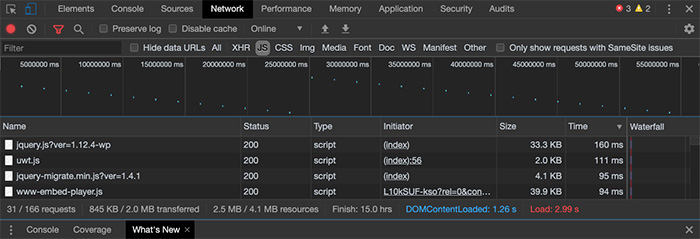
The first step in reducing HTTP requests is to see how many your site is currently fulfilling. A simple way to figure this out is to use the Developer Tools that are built into the Google Chrome browser.
To access the tools, right-click on the page you want to analyze and click “Inspect.” Then click the “Network” tab that appears at the top of the Inspect window. Once you have the tab open, reload the page. As the page loads, you will start to see all the requests being fulfilled in real-time. After the page is finished loading, you’ll see the total number of requests appear in the bottom right corner.
If you’re not a very technical person, many of the requests you see won’t make much sense to you. So let us clear some things up.
There are three types of requests you’ll want to pay attention to: scripts, stylesheets, and images.
Let’s cover scripts and stylesheets first.
Reducing Scripts & Stylesheets
While in the Network tab of the Inspect tool, click the “JS” button in the filter bar. Now you can see all the scripts the page is running. You can do the same for “CSS” to see the stylesheets.
Next, reorder the files by load time by clicking on the “Time” column. This will display the scripts that are taking the longest to load at the top of the list. Next, hover over the name of each script to see where they are being generated. Now you can start making a list of all the scripts and stylesheets that are taking the longest to load or that seem unnecessary and where they are coming from.
In most cases, the scripts and stylesheets that are the most costly to your website are generated by plugins. So, the first step to reducing the number of scripts and stylesheets your site is running is to go through your plugins and delete any that you are no longer using.
In some cases, you may want to replace a plugin that is generating a lot of requests or taking a while to load with a different one that offers similar features but is more lightweight.
The next thing you can do is prevent certain scripts and stylesheets from running on pages that do not need them. For instance, if you use a plugin to generate a contact form, the scripts and stylesheets that plugin uses will run on every page, no matter if the form appears on the page or not. This will cause your site to process unnecessary requests and slow down your site with unused resources.
Use the Asset CleanUp Plugin
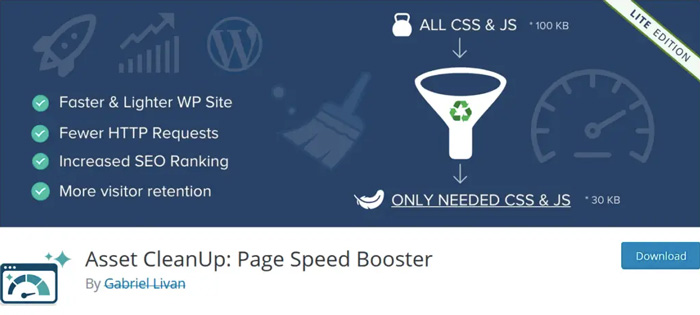
The best solution for preventing these unneeded scripts and stylesheets from running is a plugin called Asset CleanUp. Once the plugin is active, go to edit one of your pages and you’ll see a new window that shows a list of all the JavaScript and CSS files the page is running. Then you can go through and select the files you’d like to disable for that page.
After you’re finished, be sure to double-check the front-end of the page to make sure nothing is broken. If everything is looking good, reopen the Inspect tool and confirm that the scripts and stylesheets you disabled are no longer running on the page.
2. Reduce Image Sizes
Once you’ve brought down your HTTP request count, the next thing to look at is the size of your images. Reducing your image sizes can make a huge difference in load times, especially on mobile. So, let’s go over how to properly optimize your images.
As a baseline, you should try to never upload an image that’s larger than 200 KB. The only situation where you may want to ignore this standard is if you are a professional photographer and need to display your images at very high quality for clients or are making them available for download.
Now, let’s go over what determines an image’s size.
The main factors that determine the size of an image are its dimensions, quality, and file type.
Dimensions
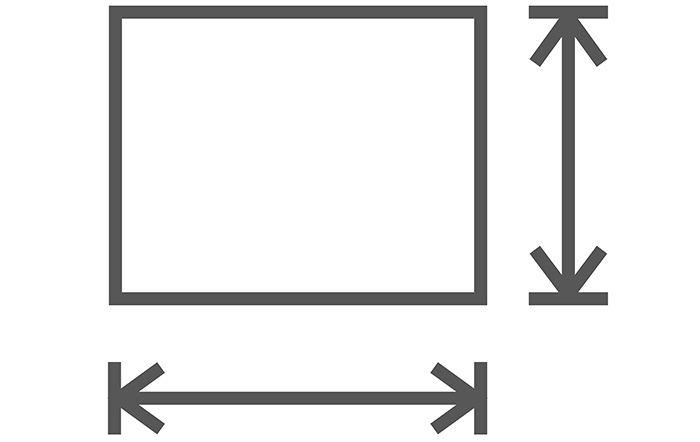
The dimensions of an image are determined by the length of its width and height. When deciding on what dimensions an image should use, consider where on the page it will be displayed. How much space are you wanting it to occupy? Because your images will be appearing on the web, you’ll want to use pixels as the unit of measurement when determining the optimal size for an image.
Once you know how much space you want your image to occupy, adjust the dimensions of the image in the photo editing software of your choice. For images that you want to extend the entire width of the screen, 1920 px wide should be your absolute max. This will ensure that these images won’t appear stretched out on larger screen sizes.
Image Quality
Once you know the dimensions of your image, the next step is determining its quality.
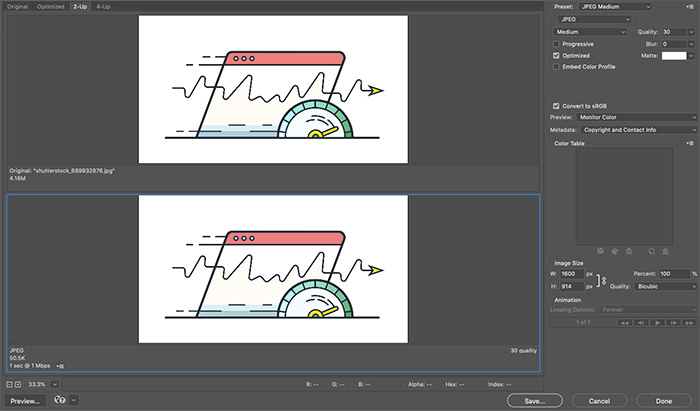
In Photoshop there is a feature called “Save for Web” that allows you to adjust the image quality of your photo while comparing it to the original. This allows you to see in real-time how much quality you are losing as you make your adjustments.
Most images show a very small drop in quality at 50, however, this is not always the case. That’s why it’s best to use your own judgment for each image and select the quality you’re comfortable with.
It’s also important that you set your images DPI (Dots Per Inch) to 72, as this is the optimal number for the web.
File Type
The last thing to determine is your image’s file type. This part is easy. For the vast majority of images, you will use the JPEG format. This file type allows for the best compression and will give you the smallest possible image size.
If your image uses a transparent background, you will want to use the PNG or SVG file type. JPEG images do not allow for transparent backgrounds and will turn them white by default, so make sure you keep that in mind when choosing your image’s file type.
Use ShortPixel Adaptive Images Plugin
If you use a lot of images on your website, then the ShortPixel Adaptive Images plugin could be a big difference-maker for you. This plugin will automatically resize, crop, and optimize your images to further reduce their size. It can also serve your images in next-gen formats like WebP to bring their size down even further.
3. Use A Caching Plugin
While we’re on the topic of awesome plugins to help you speed up your site, let’s talk about WP Rocket. This is a caching plugin that makes it super easy to immediately speed up your website. With a long list of features, this plugin offers the most comprehensive list of options for optimizing your site’s load speed.
One such feature is HTML, JavaScript, and CSS minification and combination. What this means is that the plugin will automatically strip out all the excess space in each of these files and combine them into one or several files so that the browser can read through the code more quickly and easily, thusly increasing your site’s load speed.
To see everything this plugin can do, check out the Features page on their site to learn more. There are also plenty of tutorials on YouTube you can watch to give you a better understanding of what each feature does and how it could be useful on your website.
Other caching plugins worth considering include Autoptimize, WP Optimize, and W3 Total Cache.
4. Keep Your System PHP Version Up to Date
Making sure that your website is running on the most recent version of PHP is an easy way to ensure you’re operating at peak performance. Depending on who’s hosting your website, you may be able to log into your control panel and update your system PHP on yourself. If you don’t have this option, you can contact your host directly and ask them to check your PHP version and update if necessary.
5. Enable PHP-FPM on Large Websites
If you have an e-commerce website or one that has a lot of videos, pages, or other assets, enabling PHP-FPM will help your site handle high loads and traffic. Your host can also perform this task for you if you are not able to do it yourself in your hosting control panel.
You’ve Done Everything And Your Website is Still Slow
If after trying all 5 of these solutions your website is still slow, then it might be time for one of two things. Your website needs to be completely rebuilt or you need to change your host/migrate to a CDN. Barta Media Group offers best-in-class web development and design services for small to medium-sized businesses, healthcare clinics, and e-commerce businesses. To learn more, send us a message by going to our Contact Page and filling out the form or by simply giving us a call.