
Google Analytics is an essential tool for marketers and small business owners that helps them determine the impact of their online marketing efforts and how users are interacting and engaging with your website. However, Google Analytics can be a bit intimidating at first with its many features and segmentation tools. For first time users, it can be helpful to have an expert handle the initial setup of your Analytics account for you.
In this post, we’ll show you how to add a new user to your Google Analytics account. This gives other people such as coworkers, agencies, and consultants, access to your analytics data without needing to give out your personal Google Account information.
Step 1: Log In
Go to Google Analytics and log into your Analytics account.

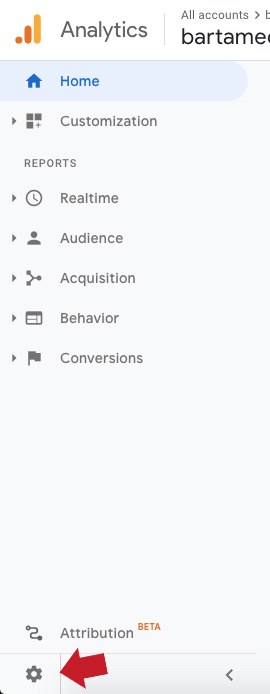
Step 2: Access Admin Panel
Navigate to the Admin panel by clicking on the gear icon on the bottom right corner.
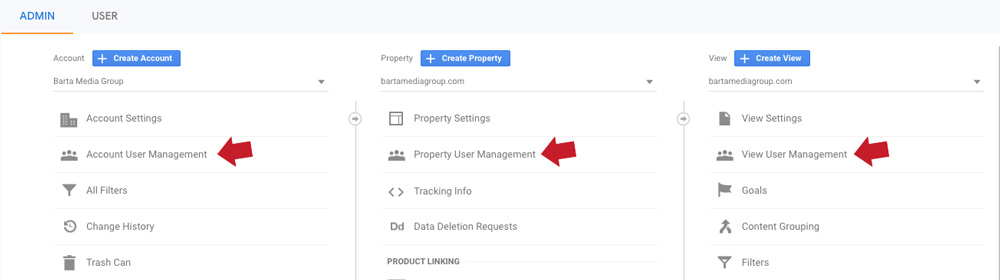
Step 3: Choosing Account, Property or View
Once you’re inside the admin panel you can grant access to either the entire account, a property, or a view.
- Account level permission allows the user to view all the information contained within; including all properties and the views within those properties.
- Property level permission allows the users to view all the data that is associated with that property.
- View level permission allows the user to only see the data and information contained in that single view.
Step 4: Granting Permission
Once you have decided on the level of permission you’d like to grant your new user, the next step is to enter their email address and assign their permissions. In the input box, enter the email address of the new user. Then assign permissions based on their needs. If you only want the new user to be able to read your data and not be able to alter or change any settings, assign them the Read & Analyze permission. If you are wanting to add them as a Power User who needs complete admin control, then check all of the boxes.

Step 5: Confirmation
Once you’re finished assigning your permissions, click the Add button. You will then see a success message at the top and the user will be added to the list of current users.