What Is a 301 Redirect?
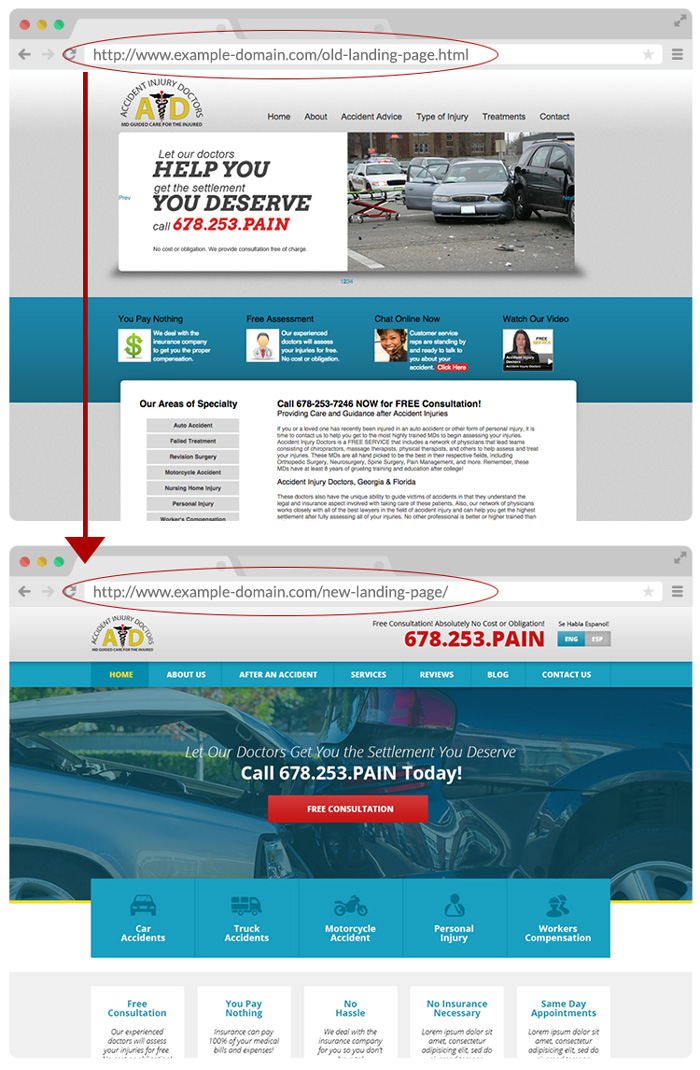
A 301 redirect is a permanent redirection from either an unused page, a broken URL, or an entire domain to another. You can have these redirects take a user to a URL on the same domain or to a URL on a different domain.
Why Are 301 Redirects so Important?
What makes 301 redirects different from others is their SEO benefit. Google relies heavily on backlinks as a metric for their search engine algorithm. These backlinks carry equity based on how trustworthy, popular, and relevant the site is to the site it is linking to.
Links coming from these sites can greatly increase the rankings of a site for the keywords they are targeting. So as you can see backlinks are very important.
But what happens if you move to another domain, or the page it links to no longer exists, or the article is several years old, out of date, and needs to be updated? This is where 301 redirects really shine.
301 redirects differ from others due to the fact that they are capable of transferring the “equity” of a backlink from one URL to another. However, they are still only capable of transferring around 90% of the equity, which is still a lot better than nothing.

301 redirects are also “permanent.” This type of redirection lets the crawlers know that this is the new URL that they are to reference from now on. It works a lot like a change of address when you move to a new home. If you still want to receive all of your mail and correspondence, then you need to let the senders know that you are at a new address.
Now that we know why 301 redirects are important, we need to know how to implement them, and luckily the process is very simple.
How To Implement 301 Redirects
There are several different ways to actually implement redirects, but they all boil down to two elements, the old URL and the new URL.
First, you must identify the page or file that you want to redirect. It is important to take into account that this URL must be from your website. You can’t redirect a URL from another source to your own domain. You can however direct your own URL to any other domain of your choice.

Once you have identified the original, it’s time to decide where you would like to redirect it. The answer to this question depends on your reasoning behind the redirect. If you’re trying to clean up 404 errors then you should direct the user to the new page, or a page that’s very similar to the old one. If you’re updating an older article than you’re gong to want to direct it to the new and improved version. Once you know this, the rest is simple.
Redirects for WordPress Sites
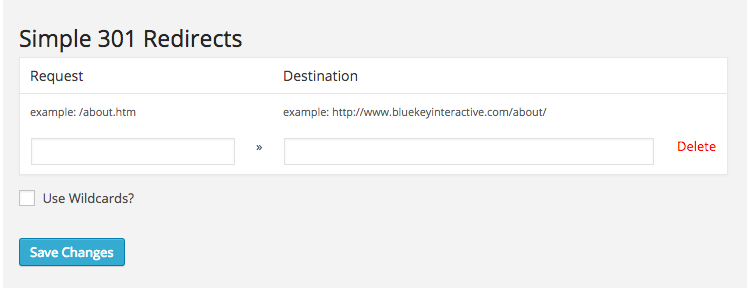
If you have a WordPress website, 301 redirects are very simple. There are a multitude of different plugins that can handle this task, but I prefer the Simple 301 Redirects plugin.
To use it you simply download and activate the plugin within your WordPress dashboard. Once done, you can manage your redirects in Settings > 301 redirects. Here you will see two fields, one for the old URL and one for the new.

All you have to do is copy and paste the two URL’s, hit save and you’re done!
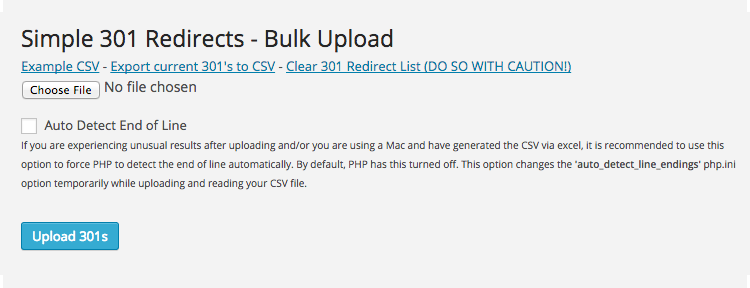
However, if you have more than a handful of redirects this can become very tedious and time-consuming. Luckily there is an additional bulk editor plugin that allows you to upload a CSV file of all the redirects you want to do. This plugin enables you to do hundreds or thousands of redirects in a matter of seconds.

While this is very simple and easy to do, there can be some drawbacks. Plugins sometimes malfunction, go out of date or are not compatible with the current or future versions of the CMS. However, there is another option for those looking for more reassurance and are a little more tech-savvy.
Redirects in .htaccess
For people with sites hosted on Linux/Unix servers, 301 redirects can also be done directly using Apache through the .htaccess file. An .htaccess file is a directory level configuration file that allows for decentralized management of web server configuration. It’s also a very handy place to dump those 301 redirects that you want to implement.
**Warning** If you already have code inside your .htaccess file, it is very important that you don’t add, delete, or rearrange anything. Always play it safe and download a local copy of the .htaccess file in case anything goes wrong.
Once you’re in, the process is very simple. Each redirect goes on it’s own separate line, with three different elements per line separated by a space; redirect type, old URL, and new URL.
Since we’re dealing with only 301’s the format will look like this:

Once you have finished copy and pasting or typing in all of your redirects; save and re-upload back to the server.
Your redirects should now be up and running. It’s very important that you spot check several of the URL’s to make sure that everything is redirecting as it should. It’s very common to accidentally put the same URL twice and get stuck in a redirect loop.
That should cover everything you need to know about 301 redirects.
